
Insight 113 — Implant Impressions: Key Checks
If an impression or scan contains an error, the lab usually does not notice it, and that error passes straight into the prosthesis. That is why we check a few things before sending the work. These checks take only a few minutes, but they prevent most remakes and most prostheses that do not seat passively.
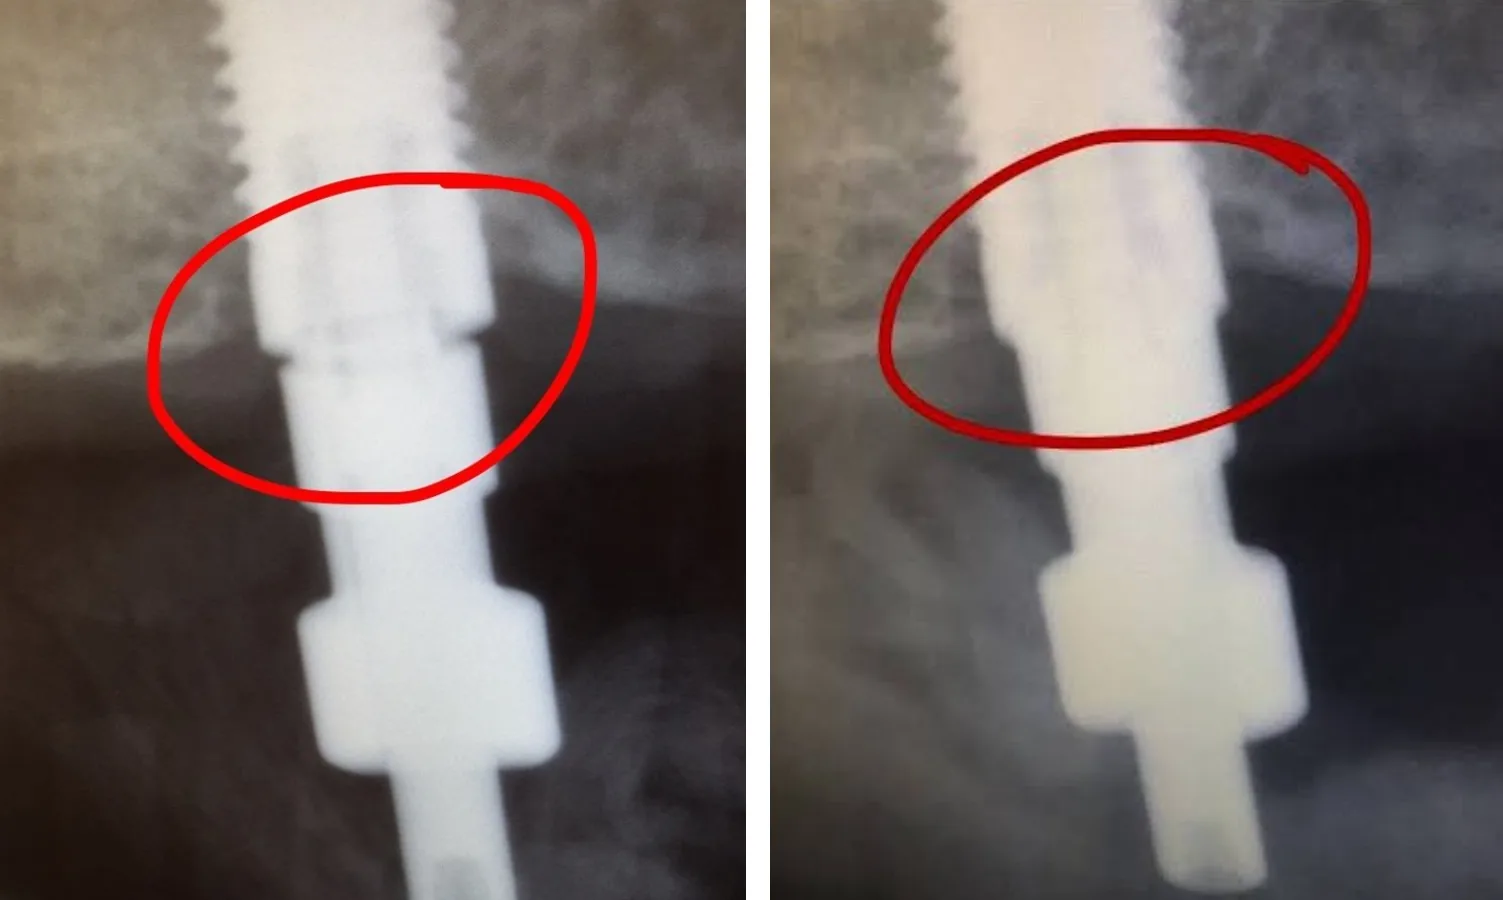
Complete seating of the coping or scan body on a radiograph
Wherever the implant margin is subgingival and cannot be seen, we check complete seating of the coping or scan body with a radiograph. The beam must be perpendicular to the long axis of the implant. If the beam is angled, the edge of the coping and the implant platform overlap and a small gap between them stays hidden. When the beam is perpendicular, the implant threads appear clear and sharp on both sides. If the threads are blurred or overlapping, we change the angle and take the image again.
When the implant is deep, I myself trim the gingiva slightly before the impression so that the coping seats easily. Once it has seated, I rotate it slightly to make sure it has no rotational play and the anti-rotation feature is engaged, and then I tighten the screw firmly. In most cases this method gives confidence even without a radiograph.
Recording the emergence profile with a customized coping
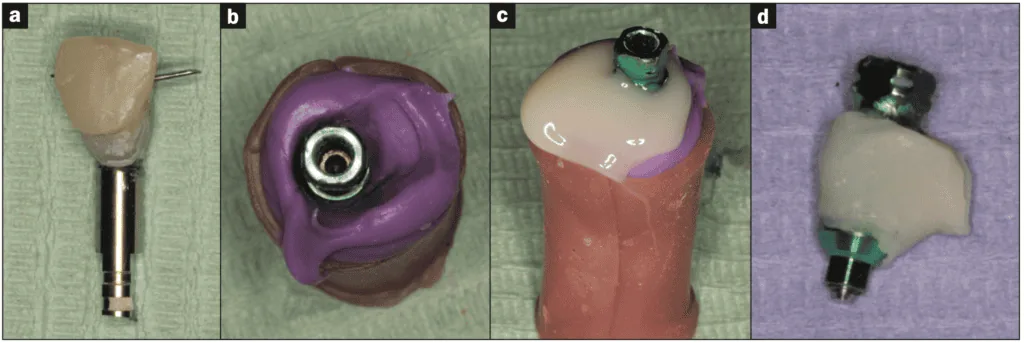
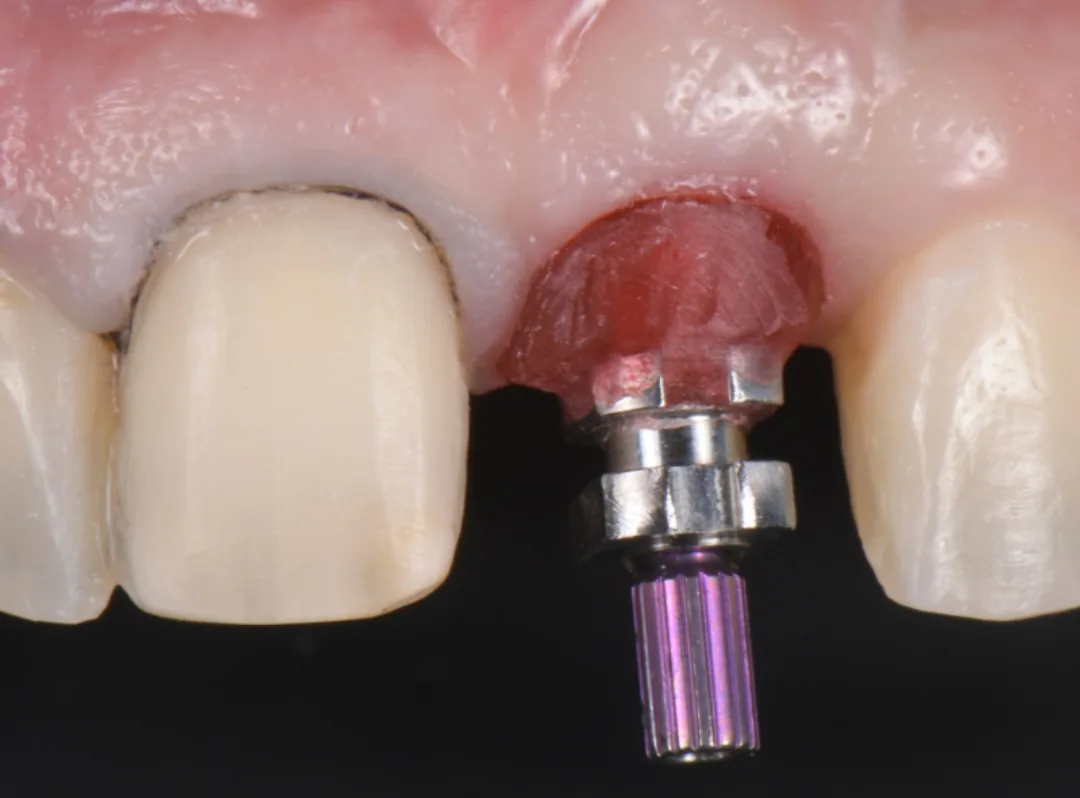
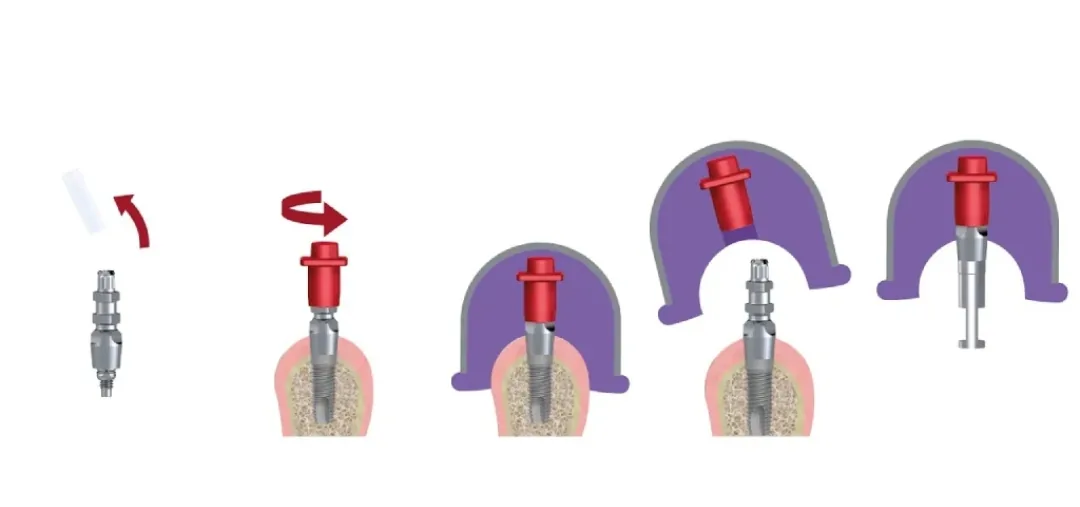
When the gingiva has been shaped with a provisional crown, a tunnel has formed in the gingiva around the implant whose shape is the shape of the subgingival part of the provisional. A standard coping is narrower than this tunnel. If we fasten it, the gingiva collapses around it and the impression does not record the shape of the tunnel. The solution is to make the coping match the subgingival part of the provisional, that is, to customize the coping:
- We remove the provisional crown from the mouth and fasten it onto an analog.
- We press the analog and the crown into silicone until the part of the crown that was inside the gingiva is completely in the silicone and only the crown portion remains outside.
- After the silicone has set, we remove the crown. The analog stays in the silicone, and the imprint of the subgingival part of the crown remains in the silicone like a small mold.
- We fasten the coping onto the same analog. There is now an empty space between the coping and the silicone wall.
- We fill this space with acrylic resin or flowable composite and let it harden.
The coping that comes out has, at its base, the same shape as the provisional crown. In the mouth it holds the gingiva in place as the provisional did, and the impression records the shape of the gingiva correctly.
Tray and material
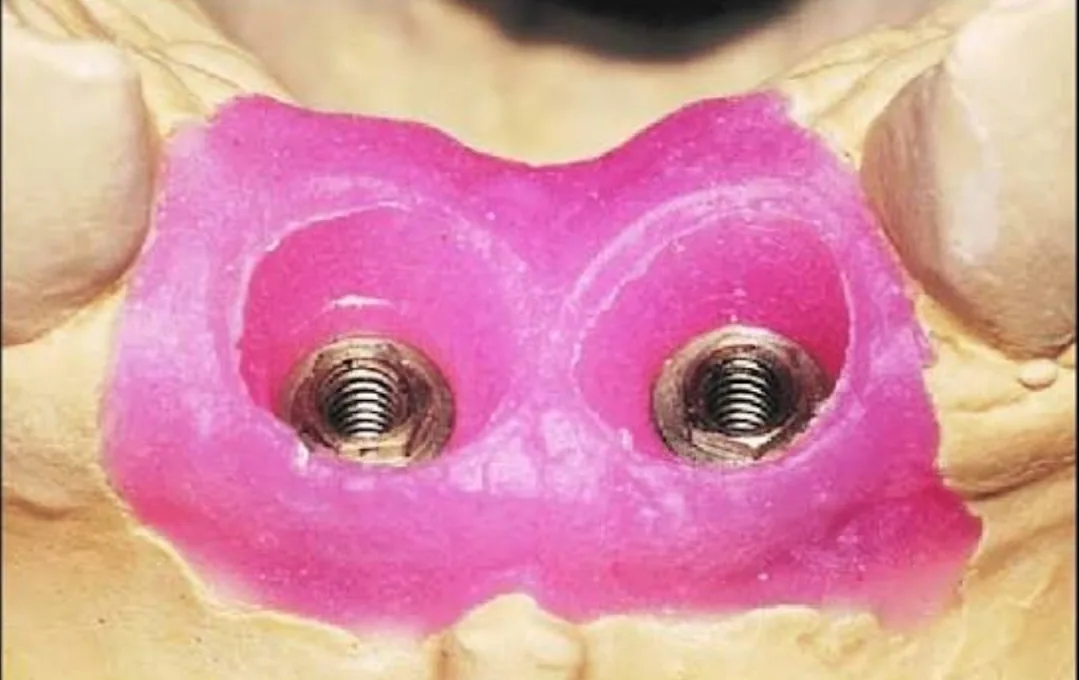
The tray must not flex on removal, and the material must be rigid enough after setting to hold the coping firmly. We also do not remove the tray from the mouth before the time the manufacturer specifies for the material to set completely.
Checking the impression before sending
There should be no bubbles or voids around the coping, especially over the retentive projections and grooves of an open-tray coping. The coping must not move or rotate in the impression, and the material must not have separated from the tray anywhere. In the closed-tray technique, the coping’s seat in the impression must be sharp and complete, and when we put the coping back it should seat with a distinct locking feel. If any of these is not right, we repeat the impression.
Attaching the analog
In the open-tray technique, the coping stays in the impression after the tray is removed. From the inner side of the impression, the side that faced the gingiva, only the base of the coping, its connection, is visible, and the head of the guide screw protrudes from the back of the tray. We place the analog on the base of the coping and tighten the guide screw from the back of the tray so that the analog is fastened to the coping. While tightening, we hold the analog firmly with a finger or a pair of tweezers. If we do not hold it, the rotation of the screw is transmitted to the coping, and the coping may rotate slightly in the material so that the rotational orientation of the implant is transferred incorrectly. We tighten the screw by hand and finally check that there is no gap between the analog and the coping.
In the closed-tray technique, the coping stays on the implant in the mouth after the tray is removed, and only its empty seat is recorded in the impression. We unscrew the coping from the mouth and attach the analog to it outside the mouth. Then we place the coping and analog together in the coping’s empty seat in the impression, so that the flat surface of the coping faces the flat surface of its seat, and press until it seats completely with a distinct locking feel. If the coping is loose in its seat or does not seat all the way, we do not trust this impression.
Verification jig in full-arch cases
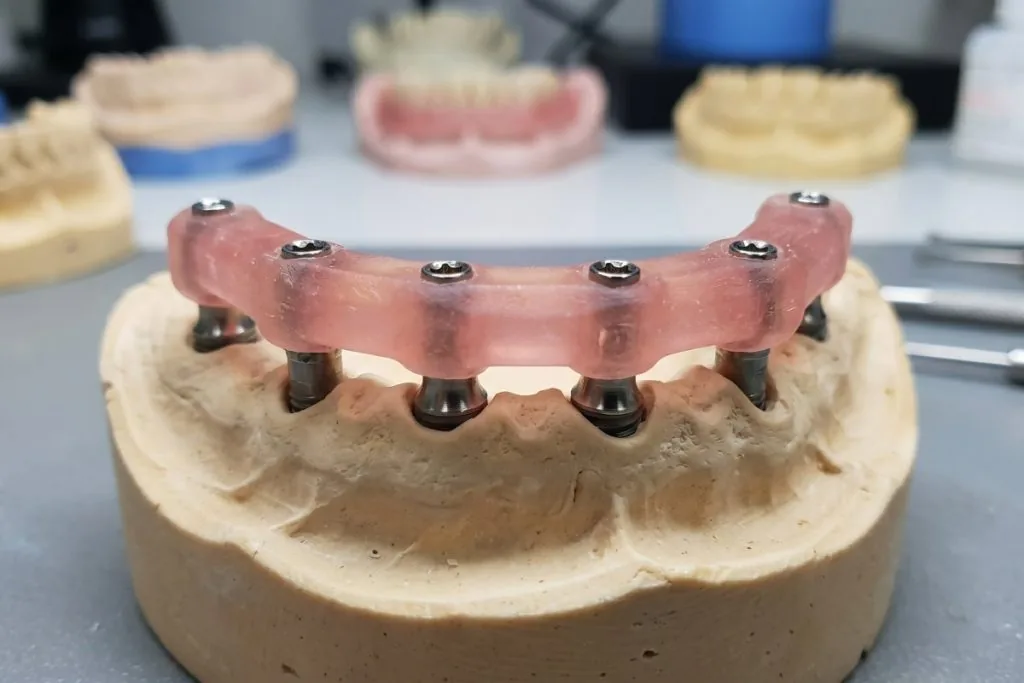
In full-arch cases all implants are connected by a one-piece framework, and a small error in the model destroys passive fit. That is why, before the definitive framework is made, we check the accuracy of the model with a verification jig. It does not matter whether the model was poured from a conventional impression or printed from a scan.
The jig is a rigid component made on this same model. On each analog we screw a metal cylinder or coping and connect them with acrylic resin. The result is a rigid bar that seats on all analogs with screws. Because resin shrinks slightly as it hardens, we usually section the connections between the implants and reconnect them with a small amount of resin.
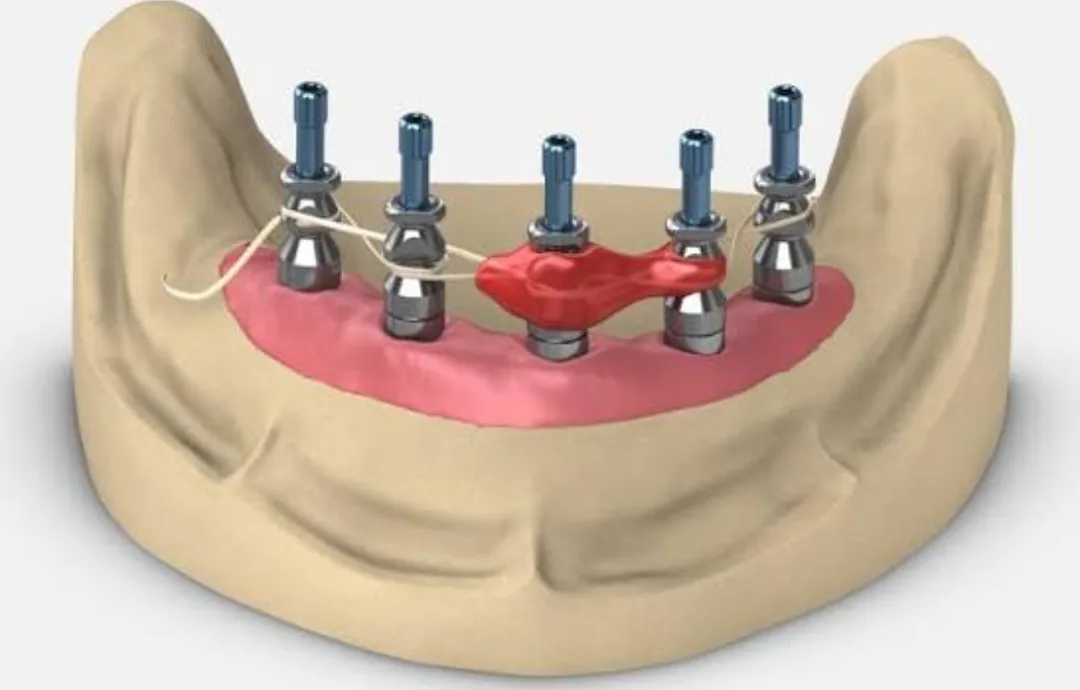
The logic is simple: the jig seats on the model without stress. If the model transferred the positions of the implants correctly, it must also seat on all the implants in the mouth without stress. To test it, we tighten the screw of only one implant at one end of the arch and check whether the jig sits without a gap on the other implants. Then we repeat the same from the other end of the arch. If the jig lifts away from an implant anywhere, the model is not accurate. In that case we section the jig in that area, screw the pieces separately onto the implants and reconnect them with resin in the mouth. The jig now carries the correct positions of the implants, and the model is corrected from it or remade.
Checking the scan before sending
This check is the digital version of the impression check. The scan body must be fully seated and, wherever in doubt, checked with a radiograph. The scan body itself must be intact and free of scratches and must not have been used more than the permitted number of times. The part of the scan body above the gingiva must be recorded completely, without holes and without traces of blood or saliva. If the emergence profile is needed, the tissue must have been scanned before the gingiva collapses. We also write down the type of scan body, the implant system and the platform diameter precisely for the lab.
This page is intended for educational use by dentists and dental students.